Scaffolding and REST
Introduction
Scaffolding means purely and simply that a basic scaffold for an application is created with a generator. This scaffold not only contains the model but also a simple web GUI (views) and of course a controller. The programming paradigm used for this is REST (Representational State Transfer).
You can find a definition of REST at wikipedia.org/wiki/Representational_state_transfer. My super short and slightly oversimplified version: the inventor Roy Fielding described in 2000 how you can access data with a simple set of rules within the concept of CRUD and the specification of the Hypertext Transfer Protocol (HTTP). CRUD is the abbreviation for Create (SQL: INSERT), Read (SQL: SELECT), Update (SQL: UPDATE) and Delete (SQL: DELETE). This gives URLs that are easy to read for humans and have a certain logic. In this chapter you will see examples showing the individual paths for the different CRUD functions.
I think the greatest frustration with Rails arises regularly from the fact that many beginners use scaffolding to get quick results without having proper basic knowledge of Ruby and without knowing what ActiveRecord is. They don’t know what to do next. Fortunately, you have worked your way through the chapters "Ruby Basics", "First Steps with Rails" and "ActiveRecord", so you will be able to understand and use scaffolding straight away.
Redirects and Flash Messages
Scaffolding uses redirects and flash messages. So we have to make a little detour first to understand scaffolding.
Redirects
The name says it all, really: redirects are commands that you can use within the controller to skip, i.e. redirect, to other web pages.
A redirect returns to the browser the response 303 See Other
(or 302 Found for GET requests) with the new target. So
each redirect does a roundtrip to the browser and back.
|
Let’s create a new Rails project for a suitable example:
$ rails new redirect_example
[...]
$ cd redirect_example
$ bin/rails db:prepare
Before we can redirect, we need a controller with at least two different methods. Off we go with a ping pong example:
$ bin/rails generate controller Game ping pong
      create  app/controllers/game_controller.rb
       route  get "game/ping"
              get "game/pong"
      invoke  erb
      create    app/views/game
      create    app/views/game/ping.html.erb
      create    app/views/game/pong.html.erb
      invoke  test_unit
      create    test/controllers/game_controller_test.rb
      invoke  helper
      create    app/helpers/game_helper.rb
      invoke    test_unit
The controller app/controllers/game_controller.rb has the following
content:
class GameController < ApplicationController
  def ping
  end

  def pong
  end
end
Now for the redirect: how can we achieve that we get immediately
redirected to the method pong when we go to
http://localhost:3000/game/ping? Easy, you will say, we just change
the route in config/routes.rb. And you are right. So we don’t
necessarily need a redirect. But if we want to process something else
in the method ping before redirecting, then this is only possible
by using redirect_to in
app/controllers/game_controller.rb:
class GameController < ApplicationController
  def ping
    logger.info "+++  Example  +++"
    redirect_to game_pong_path
  end

  def pong
  end
end
But what is game_pong_path? Let’s have a look at the routes
generated for this Rails application:
$ bin/rails routes
   Prefix Verb URI Pattern          Controller#Action
game_ping GET  /game/ping(.:format) game#ping
game_pong GET  /game/pong(.:format) game#pong
[...]|
As you can see, the route to the action |
I will explain the details and individual options of the redirect later in the context of each specific case. For now you just need to know that you can redirect not just to another method but also to another controller or an entirely different web page.
When we try to go to http://localhost:3000/game/ping we are automatically redirected to http://localhost:3000/game/pong and in the log output we see this:
Started GET "/game/ping" for ::1 at 2026-04-19 11:03:41 +0200
Processing by GameController#ping as HTML
+++  Example  +++
Redirected to http://localhost:3000/game/pong
Completed 302 Found in 2ms (ActiveRecord: 0.0ms | GC: 0.0ms)


Started GET "/game/pong" for ::1 at 2026-04-19 11:03:41 +0200
Processing by GameController#pong as HTML
  Rendering layout layouts/application.html.erb
  Rendering game/pong.html.erb within layouts/application
  Rendered game/pong.html.erb within layouts/application
  Rendered layout layouts/application.html.erb
Completed 200 OK in 9ms (Views: 2.5ms | ActiveRecord: 0.0ms)
redirect_back_or_to
If you want to redirect the user of your web application to the page
they just came from, you can use redirect_back_or_to
fallback_path. This is very useful when a user first has to log in
before getting access to a specific page.
Older versions of this book mentioned redirect_to :back and
redirect_back. Both were removed from Rails 7+. The current
helper is redirect_back_or_to(fallback) — the fallback
argument is required so Rails always has somewhere to send
people if the Referer header is missing.
|
Flash Messages
In my eyes the term "flash messages" is somewhat misleading. Almost anyone would associate the term "Flash" with more or less colorful web pages that were implemented with the (long-gone) Adobe Shockwave Flash plug-in. But in Ruby on Rails flash messages are something completely different. They are short messages that are displayed, for example on the new page after a redirect (see section Redirects).
Flash messages are good friends with redirects. The two often work together in a team to give the user feedback on an action they just carried out. A typical example of a flash message is the system feedback when a user has logged in. Often the user is redirected back to the original page and gets the message "You are now logged in."
As an example we are once more constructing the ping pong scenario from section "Redirects":
$ rails new pingpong
      [...]
$ cd pingpong
$ bin/rails db:prepare
$ bin/rails generate controller Game ping pong
      [...]
We fill app/controllers/game_controller.rb with the following
content:
class GameController < ApplicationController
  def ping
    redirect_to game_pong_path, notice: "Ping-Pong!"
  end

  def pong
  end
end
Now we start the Rails web server with bin/rails server and use the
browser to go to http://localhost:3000/game/ping. We are redirected
from ping to pong. But the flash message "Ping-Pong!" is nowhere to
be seen. We first need to expand
app/views/layouts/application.html.erb:
<!DOCTYPE html>
<html>
  <head>
    <title><%= content_for(:title) || "Pingpong" %></title>
    <%= csrf_meta_tags %>
    <%= csp_meta_tag %>
    <%= stylesheet_link_tag :app, "data-turbo-track": "reload" %>
    <%= javascript_importmap_tags %>
  </head>

  <body>
    <% flash.each do |name, message| %>
      <p><i><%= "#{name}: #{message}" %></i></p>
    <% end %>
    <%= yield %>
  </body>
</html>
Now we see the flash message at the top of the page when we go to http://localhost:3000/game/ping in the browser:
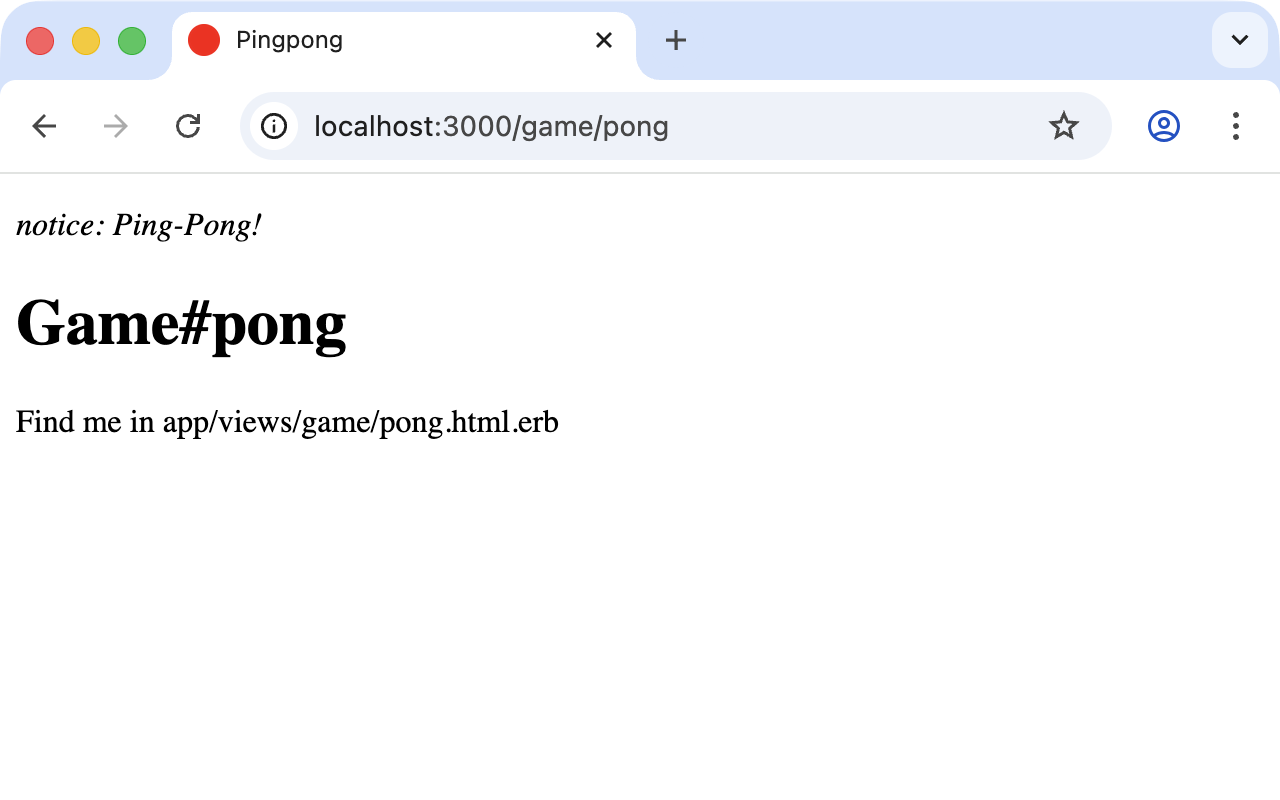
If we go to http://localhost:3000/game/pong we still see the normal Pong page. But if we go to http://localhost:3000/game/ping we are redirected to the Pong page and then the flash message is displayed at the top.
| If you do not see a flash message that you were expecting, first check in the view to see if the flash message is actually output there. |
Different Types of Flash Message
Flash messages are automagically passed to the view in a hash. By
default there are three different types: error, warning and
notice. You can also invent your own category and then get it in
the view later.
You can set a flash message by writing the hash directly too:
flash[:notice] = "Ping-Pong!"Please have a look at the official documentation at https://guides.rubyonrails.org/action_controller_overview.html#the-flash for more information.
Why Are There Flash Messages At All?
You may wonder why there are flash messages in the first place. Couldn’t you just build them yourself if you need them? Yes, indeed. But flash messages have the advantage that they offer a defined approach that is the same for any programmer. So you don’t need to start from scratch every single time you need one.
Generating a Scaffold
Let’s first use scaffolding to create a list of products for an online shop. First we need to create a new Rails application:
$ rails new scaffold-shop
  [...]
$ cd scaffold-shop
$ bin/rails db:prepare
Let’s look at the scaffolding options:
$ bin/rails generate scaffold
Usage:
  bin/rails generate scaffold NAME [field[:type][:index] field[:type][:index]] [options]

[...]

Examples:
    `bin/rails generate scaffold post`
    `bin/rails generate scaffold post title body:text published:boolean`
    `bin/rails generate scaffold purchase amount:decimal tracking_id:integer:uniq`
    `bin/rails generate scaffold user email:uniq password:digest`
I’ll keep it short: for our current state of knowledge we can use
bin/rails generate scaffold just like bin/rails generate model.
Let’s create the scaffold for the products:
$ bin/rails generate scaffold product name 'price:decimal{7,2}'
      invoke  active_record
      create    db/migrate/20260419085520_create_products.rb
      create    app/models/product.rb
      invoke    test_unit
      create      test/models/product_test.rb
      create      test/fixtures/products.yml
      invoke  resource_route
       route    resources :products
      invoke  scaffold_controller
      create    app/controllers/products_controller.rb
      invoke    erb
      create      app/views/products
      create      app/views/products/index.html.erb
      create      app/views/products/edit.html.erb
      create      app/views/products/show.html.erb
      create      app/views/products/new.html.erb
      create      app/views/products/_form.html.erb
      create      app/views/products/_product.html.erb
      invoke    resource_route
      invoke    test_unit
      create      test/controllers/products_controller_test.rb
      invoke    helper
      create      app/helpers/products_helper.rb
      invoke      test_unit
      invoke    jbuilder
      create      app/views/products/index.json.jbuilder
      create      app/views/products/show.json.jbuilder
      create      app/views/products/_product.json.jbuilder
As you can see bin/rails generate scaffold has already created the
model. So we can directly call bin/rails db:migrate:
$ bin/rails db:migrate
== 20260419085520 CreateProducts: migrating ===================================
-- create_table(:products)
   -> 0.0006s
== 20260419085520 CreateProducts: migrated (0.0006s) ==========================
Let’s create the first four products in db/seeds.rb:
Product.create(name: "Apple", price: 1)
Product.create(name: "Orange", price: 1)
Product.create(name: "Pineapple", price: 2.4)
Product.create(name: "Marble cake", price: 3)
Populate with the example data:
$ bin/rails db:seedThe Routes
bin/rails generate scaffold has created a route (more on this
later in "Routes"), a controller and
several views for us.
We could also have done all of this manually. Scaffolding is merely an automatism that does the work for us for some basic things. This assumes that you always want to view, create and delete records.
Without diving too deeply into the topic of routes, let’s just have a
quick look at the available routes for our example. You need to run
bin/rails routes:
$ bin/rails routes
      Prefix Verb   URI Pattern                  Controller#Action
    products GET    /products(.:format)          products#index
             POST   /products(.:format)          products#create
 new_product GET    /products/new(.:format)      products#new
edit_product GET    /products/:id/edit(.:format) products#edit
     product GET    /products/:id(.:format)      products#show
             PATCH  /products/:id(.:format)      products#update
             PUT    /products/:id(.:format)      products#update
             DELETE /products/:id(.:format)      products#destroy
[...]
bin/rails routes also prints Rails' built-in routes (health
check, Turbo helpers, Active Storage, Action Mailbox, etc.).
The eight product routes above are the ones we just generated.
|
These are all the routes and consequently URLs available for our
products in this Rails application. All routes invoke actions (in
other words, methods) in the ProductsController.
The Controller
Now it’s about time we had a look at the file
app/controllers/products_controller.rb. Scaffold automatically
creates the methods index, show, new, create, update and
destroy. These methods (actions) are called by the routes.
Here is the content of app/controllers/products_controller.rb:
class ProductsController < ApplicationController
  before_action :set_product, only: %i[ show edit update destroy ]

  # GET /products or /products.json
  def index
    @products = Product.all
  end

  # GET /products/1 or /products/1.json
  def show
  end

  # GET /products/new
  def new
    @product = Product.new
  end

  # GET /products/1/edit
  def edit
  end

  # POST /products or /products.json
  def create
    @product = Product.new(product_params)

    respond_to do |format|
      if @product.save
        format.html { redirect_to @product, notice: "Product was successfully created." }
        format.json { render :show, status: :created, location: @product }
      else
        format.html { render :new, status: :unprocessable_entity }
        format.json { render json: @product.errors, status: :unprocessable_entity }
      end
    end
  end

  # PATCH/PUT /products/1 or /products/1.json
  def update
    respond_to do |format|
      if @product.update(product_params)
        format.html { redirect_to @product, notice: "Product was successfully updated.", status: :see_other }
        format.json { render :show, status: :ok, location: @product }
      else
        format.html { render :edit, status: :unprocessable_entity }
        format.json { render json: @product.errors, status: :unprocessable_entity }
      end
    end
  end

  # DELETE /products/1 or /products/1.json
  def destroy
    @product.destroy!

    respond_to do |format|
      format.html { redirect_to products_path, notice: "Product was successfully destroyed.", status: :see_other }
      format.json { head :no_content }
    end
  end

  private
    # Use callbacks to share common setup or constraints between actions.
    def set_product
      @product = Product.find(params.expect(:id))
    end

    # Only allow a list of trusted parameters through.
    def product_params
      params.expect(product: [ :name, :price ])
    end
end
Let us take a moment and go through this controller.
set_product
A before_action calls a private method to set an instance variable
@product for the actions :show, :edit, :update and
:destroy. That DRYs it up nicely:
before_action :set_product, only: %i[ show edit update destroy ]

[...]

private
  # Use callbacks to share common setup or constraints between actions.
  def set_product
    @product = Product.find(params.expect(:id))
  end
[...]
params.expect(:id) is the Rails 8 successor to
params.require(:id). It performs the same "required
parameter" check and additionally raises a clean 400 Bad
Request response for malformed input, rather than bubbling up
as a 500.
|
index
The index method sets the instance variable @products. It
contains the result of Product.all.
# GET /products or /products.json
def index
  @products = Product.all
end
show
The show method doesn’t do anything. The set_product
before_action already set the instance variable @product. So
there is no more to do.
# GET /products/1 or /products/1.json
def show
end
new
The new method creates a new instance of Product and saves it in
the instance variable @product.
# GET /products/new
def new
  @product = Product.new
end
edit
The edit method doesn’t do anything. The set_product
before_action already set the instance variable @product. So
there is no more to do.
# GET /products/1/edit
def edit
end
create
The create method uses Product.new to create a new instance of
Product and stores it in @product. The private method
product_params is used to filter the trusted parameters with an
allow-list. When @product was successfully saved a redirect to
the show action is initiated for HTML requests. If a validation
error occurred the new action is rendered with status
:unprocessable_entity (HTTP 422). Turbo notices that 422 status
and swaps the form in place without a full page reload.
# POST /products or /products.json
def create
  @product = Product.new(product_params)

  respond_to do |format|
    if @product.save
      format.html { redirect_to @product, notice: "Product was successfully created." }
      format.json { render :show, status: :created, location: @product }
    else
      format.html { render :new, status: :unprocessable_entity }
      format.json { render json: @product.errors, status: :unprocessable_entity }
    end
  end
end

[...]

# Only allow a list of trusted parameters through.
def product_params
  params.expect(product: [ :name, :price ])
endupdate
The update method tries to update @product with the
product_params. When @product was successfully updated a
redirect to the show action is initiated for HTML requests (with
status :see_other — HTTP 303 — which Turbo requires to follow a
redirect after a form submission). If a validation error occurred
the edit action is rendered with :unprocessable_entity.
# PATCH/PUT /products/1 or /products/1.json
def update
  respond_to do |format|
    if @product.update(product_params)
      format.html { redirect_to @product, notice: "Product was successfully updated.", status: :see_other }
      format.json { render :show, status: :ok, location: @product }
    else
      format.html { render :edit, status: :unprocessable_entity }
      format.json { render json: @product.errors, status: :unprocessable_entity }
    end
  end
end
destroy
The destroy method destroys @product (destroy! raises an
exception if the delete fails) and redirects an HTML request to the
index action.
# DELETE /products/1 or /products/1.json
def destroy
  @product.destroy!

  respond_to do |format|
    format.html { redirect_to products_path, notice: "Product was successfully destroyed.", status: :see_other }
    format.json { head :no_content }
  end
end
The Views
Now we start the Rails web server:
$ bin/rails server
=> Booting Puma
=> Rails 8.1.3 application starting in development
=> Run `bin/rails server --help` for more startup options
Puma starting in single mode...
* Puma version: 8.0.0 ("Into the Arena")
* Ruby version: ruby 4.0.2 (2026-03-17 revision d3da9fec82) +PRISM [arm64-darwin25]
* Min threads: 3
* Max threads: 3
* Environment: development
* Listening on http://127.0.0.1:3000
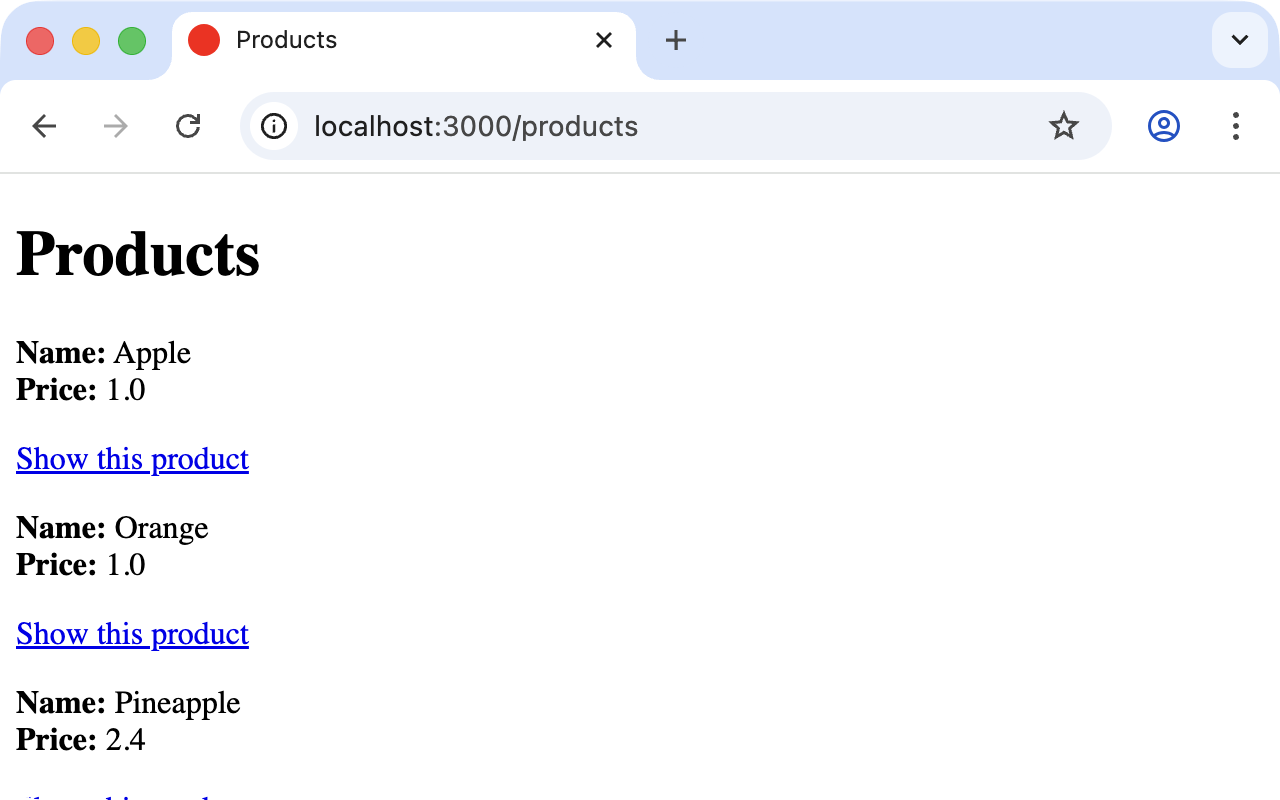
Use Ctrl-C to stopNow a little drum roll … dramatic suspense … launch the web browser and go to http://localhost:3000/products. You can see the list of products as a simple web page.
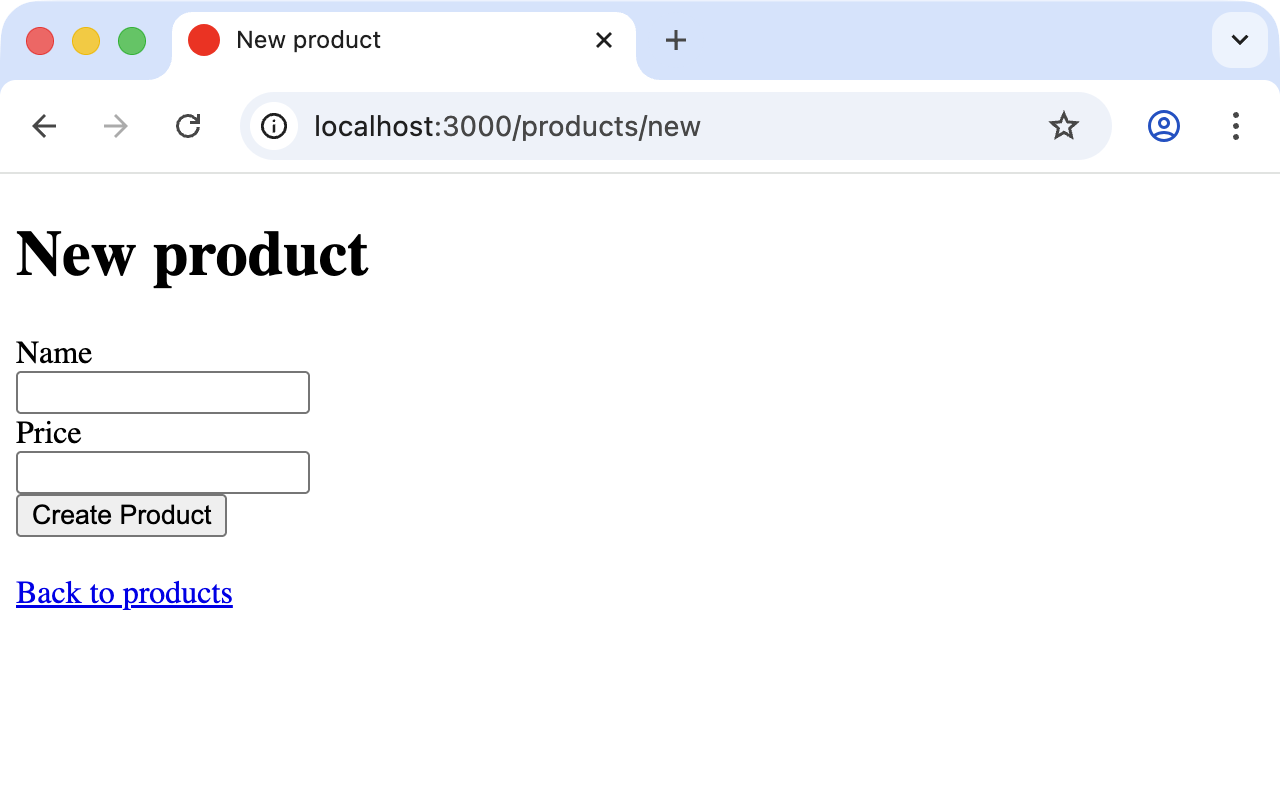
If you now click the link New product, you will see an input form for a new record:
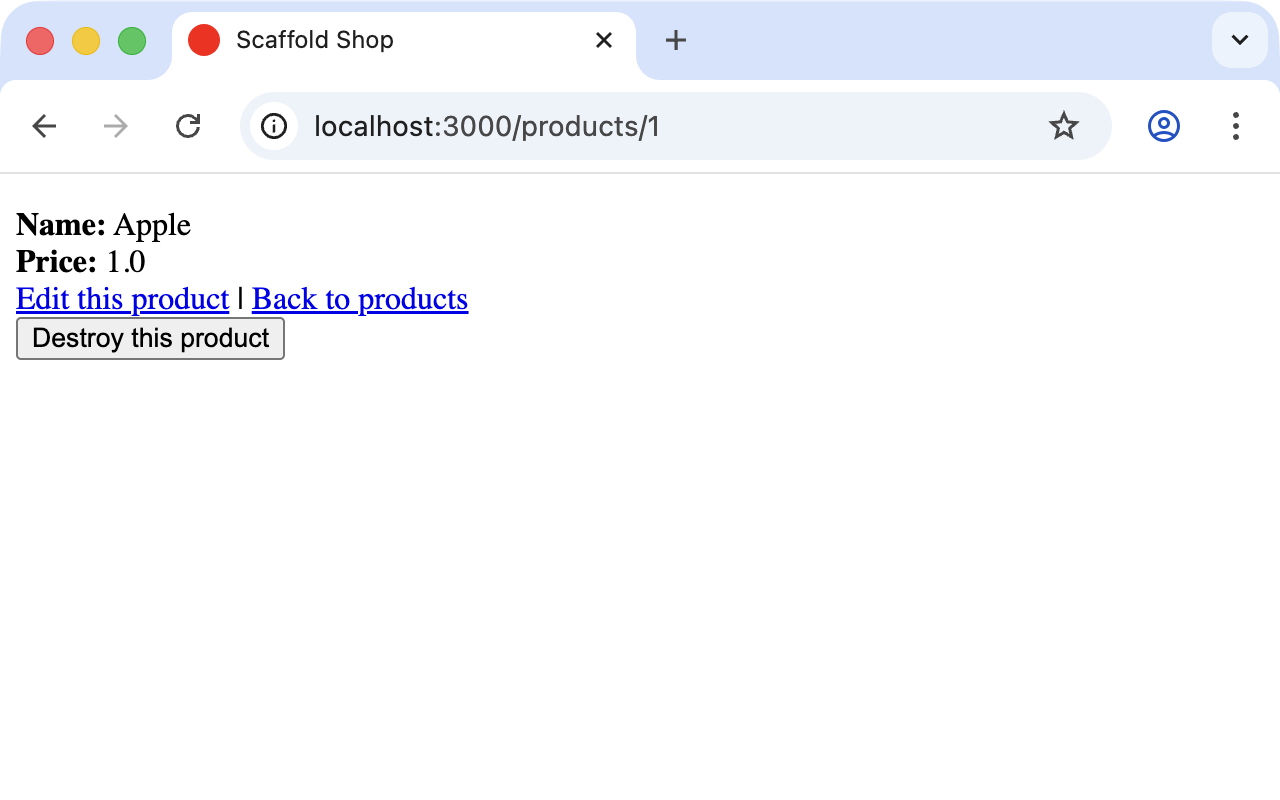
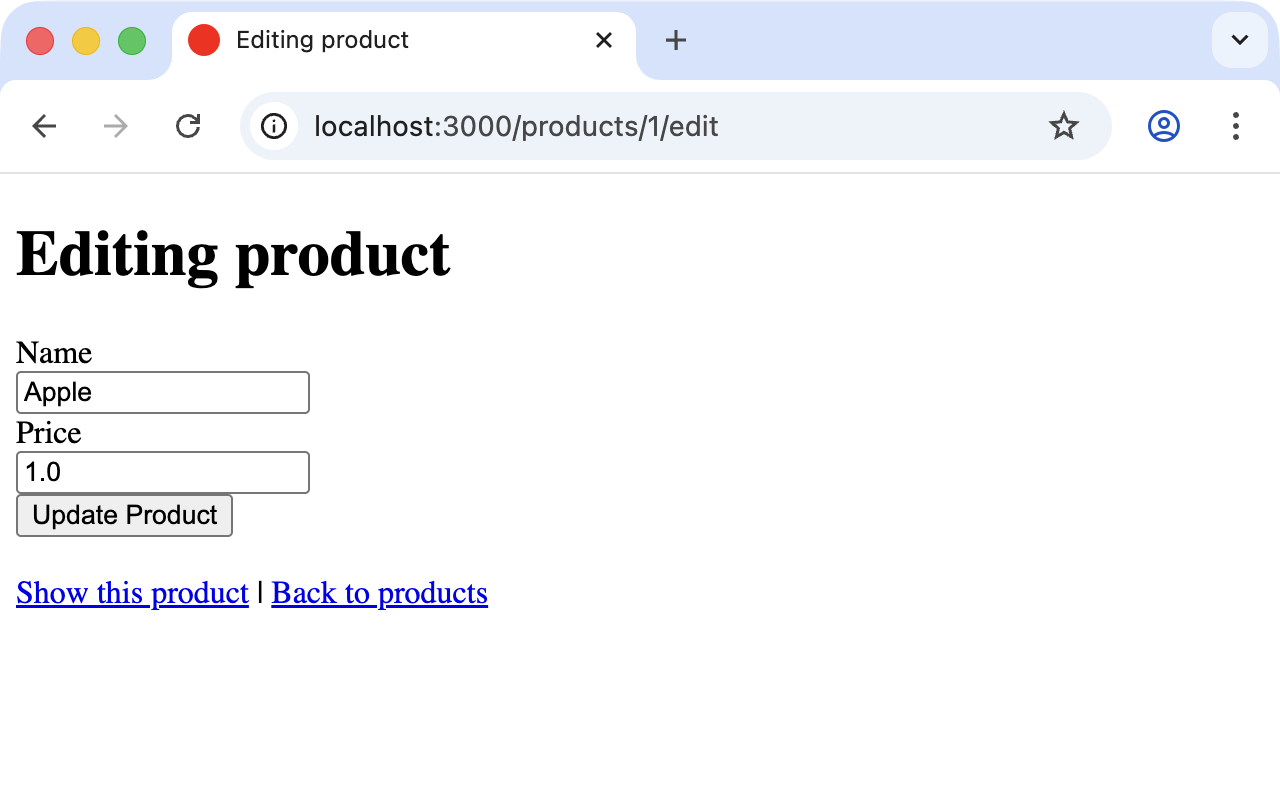
Use your browser’s Back button to go back and click on the Show this product link in the first row. You will then see the following page:
If you now click Edit this product you will see the editing view for this record:
And if you click Destroy this product on the show page you can delete the record after confirming the message that pops up. Isn’t that cool?! Within less than 10 minutes you have written a web application that allows you to *c*reate, *r*ead/*r*etrieve, *u*pdate and *d*elete/*d*estroy records (CRUD). That is the scaffolding magic. You can save a lot of time.
Rails 8 scaffolds are deliberately plain. There is no
scaffolds.scss or generated CSS anymore and the list view is
a stack of <div> partials rather than an HTML <table>.
Styling is left entirely up to you. If you prefer a table or
a fully styled Tailwind look, edit the generated erb files —
the point of a scaffold is to be a starting point, not a
final design.
|
Where Are the Views?
You can probably guess, but let’s have a look at the directory
app/views/products anyway:
$ ls app/views/products
_form.html.erb    _product.html.erb   edit.html.erb      index.html.erb
index.json.jbuilder  new.html.erb     show.html.erb      show.json.jbuilder
_product.json.jbuilder
There are two different file extensions. The .html.erb files are
for HTML requests and the .json.jbuilder files are for JSON
requests.
For index, edit, new and show the corresponding views are
located there. As new and edit both require a form for editing
the data, this is stored in the partial _form.html.erb in
accordance with the principle of DRY (*D*on’t *R*epeat
*Y*ourself) and integrated in new.html.erb and edit.html.erb
with <%= render "form", product: @product %>.
The partial _product.html.erb is new in modern Rails: it renders a
single product and is reused on both the index and the show page.
Let’s open app/views/products/index.html.erb:
<p style="color: green"><%= notice %></p>

<% content_for :title, "Products" %>

<h1>Products</h1>

<div id="products">
  <% @products.each do |product| %>
    <%= render product %>
    <p>
      <%= link_to "Show this product", product %>
    </p>
  <% end %>
</div>

<%= link_to "New product", new_product_path %>
And the per-product partial:
<div id="<%= dom_id product %>">
  <div>
    <strong>Name:</strong>
    <%= product.name %>
  </div>

  <div>
    <strong>Price:</strong>
    <%= product.price %>
  </div>

</div>
You are now an old hand when it comes to ERB, so you’ll be able to read and understand the code without any problems.
The call <%= render product %> uses Rails' "magic"
partial-lookup convention: it knows product is a Product
instance and automatically renders _product.html.erb. Writing
it as <%= render @products %> would render the whole
collection in one go (the loop would no longer be needed).
|
link_to
In the views generated by the scaffold generator you first come
across the helper link_to. This creates <a hre…> links. You
can of course also enter a link manually via <a href="…"> in the
erb, but for links within a Rails project link_to is more
practical because you can use the names of the routes as a target.
The code becomes much easier to read.
A link to new_product looks like this in the erb code (you can see
it at the bottom of app/views/products/index.html.erb):
<%= link_to "New product", new_product_path %>With link_to you can also link to resources within a RESTful
resource. Again, you can find examples for this in the show view
app/views/products/show.html.erb:
<p style="color: green"><%= notice %></p>

<%= render @product %>

<div>
  <%= link_to "Edit this product", edit_product_path(@product) %> |
  <%= link_to "Back to products", products_path %>

  <%= button_to "Destroy this product", @product, method: :delete %>
</div>
From the resource and the selected route Rails automatically
determines the required URL and the required HTTP verb (in other
words, whether it is a POST, GET, PUT or DELETE). For index and show
calls you need to observe the difference between singular and plural.
link_to "Show this product", product links to a single record and
link_to "Back to products", products_path links to the index view.
Examples:
| erb code | Explanation |
|---|---|
|
Link to the first product. |
|
Link to the web interface where a new product can be created. |
|
Link to the form where the first product can be edited. |
|
Button that sends a DELETE request to destroy the first product. |
Older Rails versions used link_to "Destroy", product,
method: :delete, data: { confirm: "Are you sure?" } for
destructive actions. In Rails 7+ the recommended pattern is
button_to (which renders an actual <form> and therefore
does not need JavaScript to issue a DELETE). For the
confirmation prompt use data: { turbo_confirm: "Are you
sure?" }.
|
form_with
In the partial used by new and edit,
app/views/products/_form.html.erb, you will find the following code
for the product form:
<%= form_with(model: product) do |form| %>
  <% if product.errors.any? %>
    <div style="color: red">
      <h2><%= pluralize(product.errors.count, "error") %> prohibited this product from being saved:</h2>

      <ul>
        <% product.errors.each do |error| %>
          <li><%= error.full_message %></li>
        <% end %>
      </ul>
    </div>
  <% end %>

  <div>
    <%= form.label :name, style: "display: block" %>
    <%= form.text_field :name %>
  </div>

  <div>
    <%= form.label :price, style: "display: block" %>
    <%= form.text_field :price %>
  </div>

  <div>
    <%= form.submit %>
  </div>
<% end %>
In a block the helper form_with takes care of creating the HTML
form via which the user can enter the data for the record or edit
it. If you delete a complete <div> element wrapping a form field,
that field disappears from the input. I am not going to comment on
all possible form field variations at this point. The most
frequently used ones will appear in examples later on and be
explained then (if they are not self-explanatory).
In Rails 7+ form_with is submitted through Turbo by default.
You don’t need to pass local: true any more (old Rails 5.x
scaffold generators added that to opt out of Rails-UJS).
If you really want a plain, non-Turbo submission you can
write form_with(model: product, data: { turbo: false }) or
set it per-controller with turbo_frame_request_variant.
|
| You can find an overview of all form helpers at https://guides.rubyonrails.org/form_helpers.html |
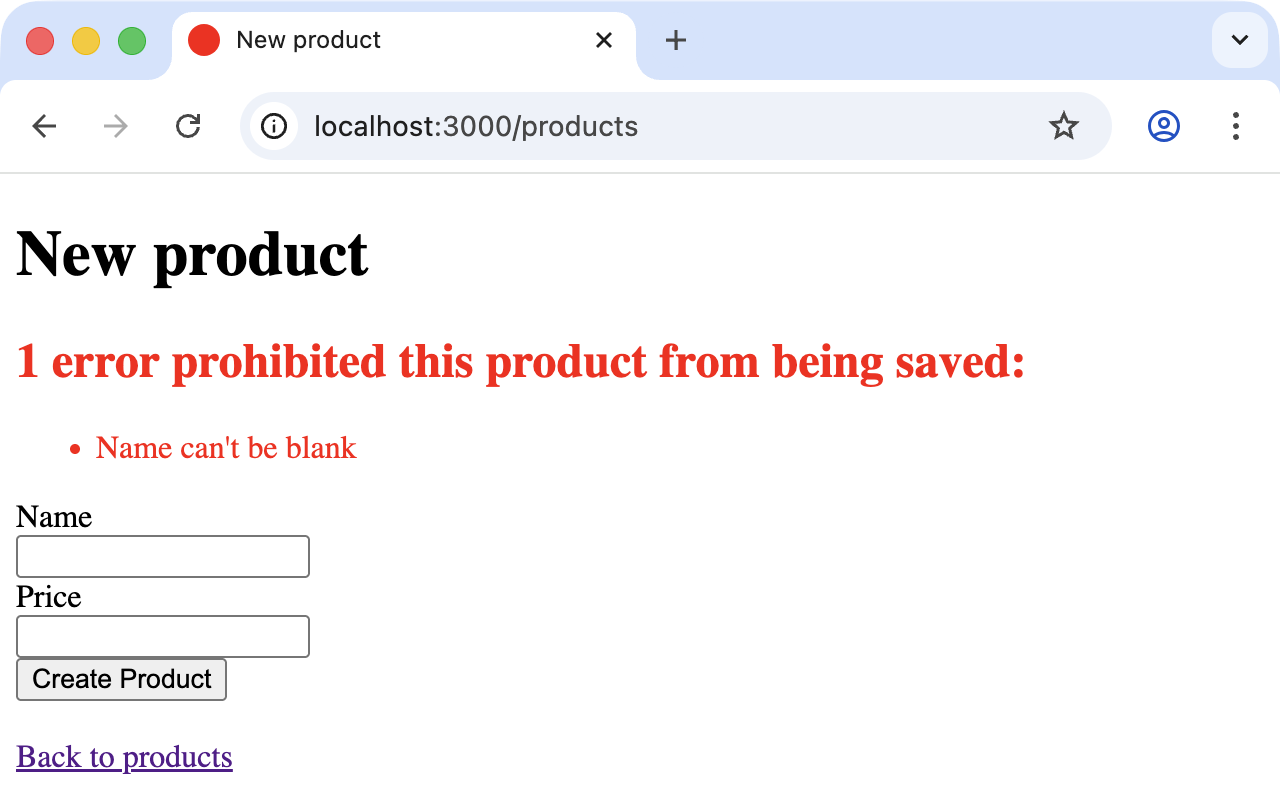
When using validations in the model, any validation errors that occur are displayed at the head of the form by this code block:
<% if product.errors.any? %>
  <div style="color: red">
    <h2><%= pluralize(product.errors.count, "error") %> prohibited this product from being saved:</h2>

    <ul>
      <% product.errors.each do |error| %>
        <li><%= error.full_message %></li>
      <% end %>
    </ul>
  </div>
<% end %>
Let’s add a small validation to the app/models/product.rb model:
class Product < ApplicationRecord
  validates :name, presence: true
end
Whenever somebody tries to save a product which doesn’t have a name Rails will show this form error:
Access via JSON
By default Rails' scaffolding generates not just access via HTML for
human users but also a direct interface for machines. The same
methods index, show, new, create, update and destroy can
be called via this interface, but in a format that is easier for
machines to read. As an example, we will demonstrate the index
action via which all data can be read in one go. The same idea
applies to all the other actions.
JSON (see en.wikipedia.org/wiki/JSON) is effectively the lingua franca of web APIs. So we use JSON.
If you do not require machine-readable access to data you can remove
this line from the Gemfile (followed by bundle):
# Build JSON APIs with ease. Read more: https://github.com/rails/jbuilder
gem "jbuilder"
Of course you can delete the format.json lines manually too. But
please don’t forget to delete the json.jbuilder view files as well.
JSON as Default
Right at the beginning of app/controllers/products_controller.rb
you will find the entry for the index action:
# GET /products or /products.json
def index
  @products = Product.all
end
The code is straightforward. In the instance variable @products
all products are saved. The view
app/views/products/index.json.jbuilder contains the following code
to render the JSON:
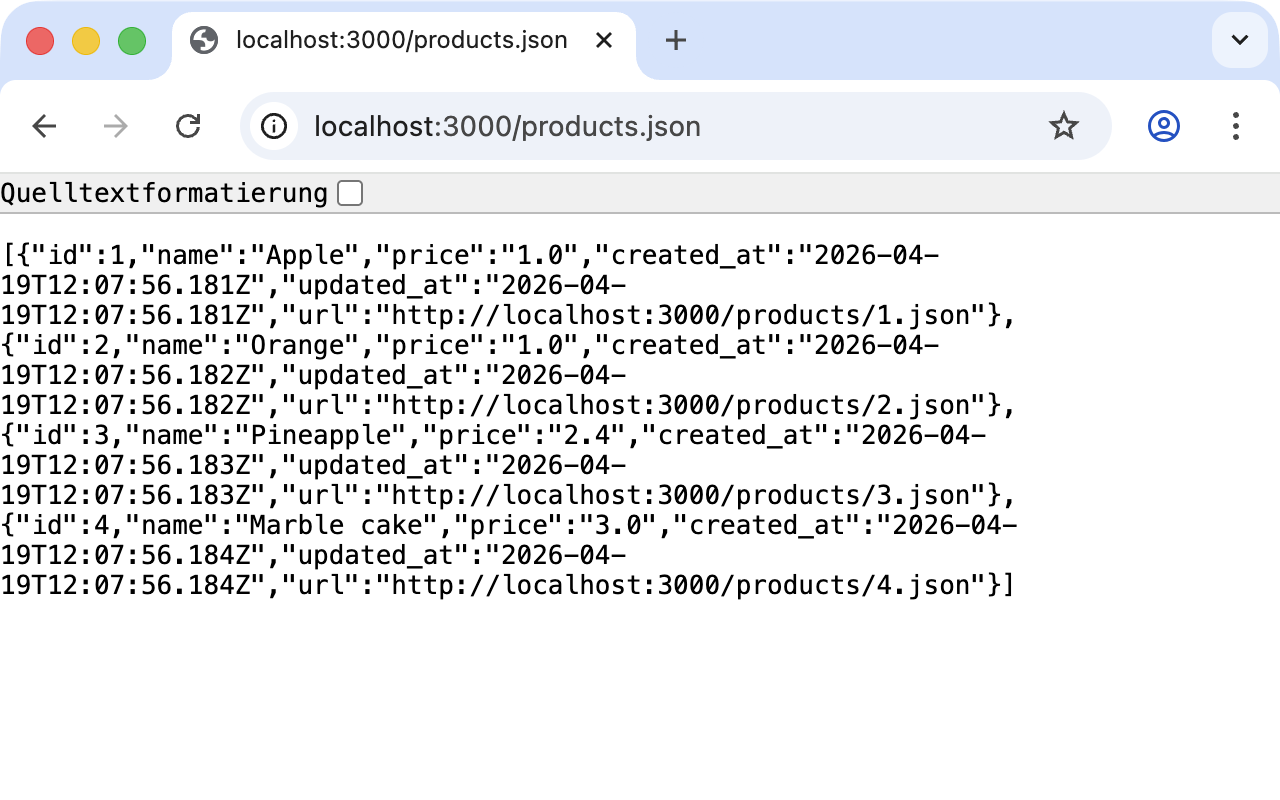
json.array! @products, partial: "products/product", as: :productIt renders the partial _product.json.jbuilder:
json.extract! product, :id, :name, :price, :created_at, :updated_at
json.url product_url(product, format: :json)
You can use your browser to fetch the JSON output. Just open http://localhost:3000/products.json and view the result. A JSON viewer extension makes the output nicer to read:
If you do not want the JSON output you need to delete the
json.jbuilder files.
JSON and XML Together
If you ever need a JSON and XML interface in a Rails application you
just need to specify both variants in the controller in the block
respond_to. Here is an example with
app/controllers/products_controller.rb in the index action:
# GET /products
# GET /products.json
# GET /products.xml
def index
  @products = Product.all

  respond_to do |format|
    format.html # index.html.erb
    format.json { render json: @products }
    format.xml  { render xml:  @products }
  end
end
When Should You Use Scaffolding?
You should never use scaffolding just for the sake of it. There are Rails developers who never use scaffolding and always build everything manually. I find scaffolding quite useful for quickly getting into a new project. But it is always just the beginning.
Example for a Minimal Project
Let’s assume we need a web page quickly with which we can list
products and show them individually. But we do not require an
editing or deleting function. In that case a large part of the code
created via scaffold would be useless and have to be deleted.
Let’s try it out as follows:
$ rails new read-only-shop
  [...]
$ cd read-only-shop
$ bin/rails generate scaffold product name 'price:decimal{7,2}'
  [...]
$ bin/rails db:prepare
  [...]
Now create the db/seeds.rb with some demo products:
Product.create(name: "Apple", price: 1)
Product.create(name: "Orange", price: 1)
Product.create(name: "Pineapple", price: 2.4)
Product.create(name: "Marble cake", price: 3)
And populate it with this data:
$ bin/rails db:seedAs we only need index and show we should delete the views we
don’t need:
$ rm app/views/products/_form.html.erb
$ rm app/views/products/new.html.erb
$ rm app/views/products/edit.html.erb
The json.jbuilder views are not needed either:
$ rm app/views/products/*.json.jbuilderThe file app/controllers/products_controller.rb can be simplified
with an editor. It should look like this:
class ProductsController < ApplicationController
  before_action :set_product, only: [:show]

  # GET /products
  def index
    @products = Product.all
  end

  # GET /products/1
  def show
  end

  private
    # Use callbacks to share common setup or constraints between actions.
    def set_product
      @product = Product.find(params.expect(:id))
    end
end
We only need the routes for index and show. Please open
config/routes.rb and edit it as follows:
Rails.application.routes.draw do
  resources :products, only: [:index, :show]
end
A bin/rails routes shows us that really only index and show
are routed now:
$ bin/rails routes
  Prefix Verb URI Pattern             Controller#Action
products GET  /products(.:format)     products#index
 product GET  /products/:id(.:format) products#show
[...]
If we now start the server with bin/rails server and go to
http://localhost:3000/products we get an error message.
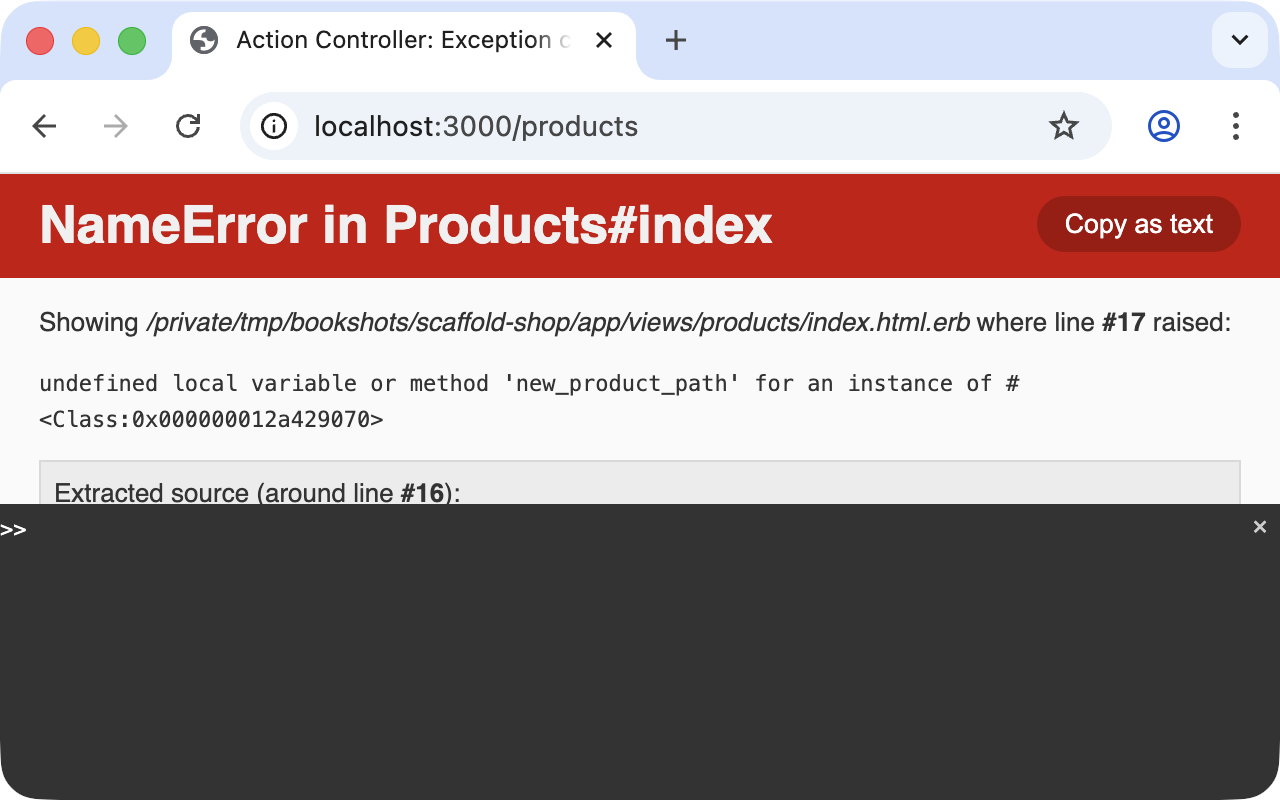
The same message will be displayed in the log:
ActionView::Template::Error (undefined local variable or method 'new_product_path' for an instance of #<Class:...>)

    14: </div>
    15:
    16: <%= link_to "New product", new_product_path %>

app/views/products/index.html.erb:17
The error message states that we reference the undefined method
new_product_path in the view app/views/products/index.html.erb.
As we only route index and show now there are no more edit,
destroy or new paths. So we need to adapt
app/views/products/index.html.erb in the editor as follows:
<% content_for :title, "Products" %>

<h1>Products</h1>

<div id="products">
  <% @products.each do |product| %>
    <%= render product %>
    <p>
      <%= link_to "Show this product", product %>
    </p>
  <% end %>
</div>
And while we are at it we also edit
app/views/products/show.html.erb accordingly:
<%= render @product %>

<div>
  <%= link_to "Back to products", products_path %>
</div>
Now our application is finished. Start the Rails server with
bin/rails server and open http://localhost:3000/products in the
browser.

| In this example I am not commenting on the required changes in the tests, as this is not an exercise for test-driven development but meant to demonstrate a way of working with scaffolding. TDD developers will quickly be able to adapt the tests. |